DIY work on mains electric or gas appliances shouldn’t be carried out unless you describe yourself as “competent”. These notes are not intended as a DIY guide.
The Truma gas and electric fire in my van has never been reliable. When I bought the van the young woman who was selling it on behalf of her late dad told me that the electric heater was faulty. After I got it home I tried the fire and it worked fine………… That is until it got hot and the thermostat switched it off. Then it wouldn’t come back on again until the power was switched off and allowed to cool. It was then ok till the thermostat knocked it off again. Reading up on the fault I discovered that one or both over-heat thermostats had failed. They were just a fiver each to buy but the entire fire had to come out to replace them. (The price is considerably higher at today’s prices)
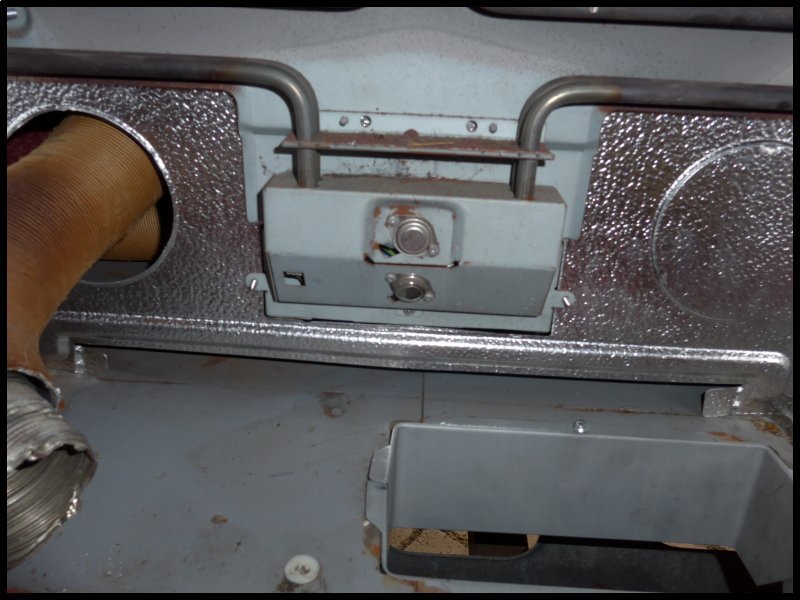
This picture shows the two thermostats. They are far from accessible. In many cases, the entire fire needs to be removed.
Whenever the caravan travelled, by the time I’d made my first stop the front cover was laying on the floor. That was solved by putting a screw through the top vent.
But worse trouble showed itself when I arrived at Portsmouth harbour at 10pm last November (2015) ready for an early morning departure. My plan was to stay overnight on the dockside and because of the cold, I needed the gas fire. It took me over half an hour to get it lit. Clearly, it was a job for the future. Once I was on a site, the electric fire was invariably used. Last week I decided to investigate. I took out the spark ignition module, put in a new battery and tested it. That was working ok and was even giving me an occasional mild shock. Next, I suspected the microswitch at the gas valve, so I substituted a spring switch, but still, the fire refused to light. Obviously, the fire would need to come out. With the gas bottle and mains electric turned off I disconnected first the electric supply to the fire, then the gas supply under the caravan. With the flue/exhaust pipe taken off, the fire was ready to lift out. Three of the five screws were only finger tight having lost their grip on the plywood/foam sandwich floor. I drilled out the holes and glued in some large plastic plugs. With the fire on the ground outside it looked a sorry sight.
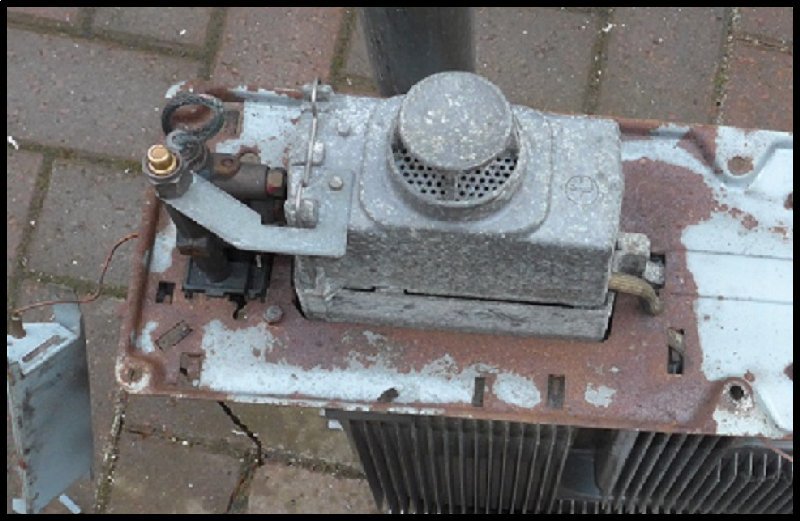
Picture of underside
Both sides were thick with rust and holed in places. After getting the burner out, I decided ………Maybe it was time for a new fire. At eighteen years old I wasn’t surprised to see that my model, the S2003 had been replaced. Comparing the new S2004 model it looked as though it would be a straight swap. Prices on the internet varied by up to £55 so I shopped around. It was ordered on Thursday and delivered on Monday – by 9.30, so I got busy straight away
The Truma caravan fire is made up of three separate units. The Trumatic is the gas fire in the front; the Ultraheat is the electric part fitted behind, and then the blown hot air system is fitted behind that. The Ultraheat attaches to the inner casing which is part of the gas fire and I was pleased to see it was simply a matter of removing the element and control box from the old case and fitting it on the new. The screw holes matched perfectly.
I’d already cleaned the years of dust and fluff from the blower fan but was then dismayed to discover that the new fire casing wouldn’t accept my TEB 2 blower.

The fan with 18 years of dust before cleaning
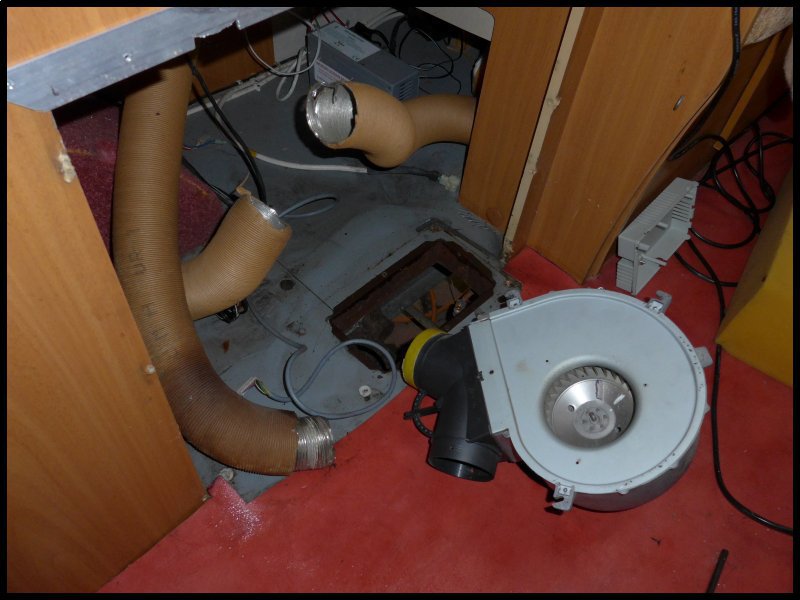
The freshly cleaned TEB2. Also the aperture in the floor, the hot air pipes and the flue
The three fixing screw plugs and the extraction hole were in quite the wrong place. My new fire was designed for the later TEB3 blower. I was reluctant to bin mine and part with 200 quid to replace it. I gave up for the day to ponder this latest setback.
With a new day, I began to see the solution. I could use my old blower if I cut the back out of my old fire, rivet it to the new and blank off and cut a new hole to suit. It worked well – although I foresaw another problem on the horizon. With the blower and the electric fire installed, it was possible to check at that stage that it was working correctly. Once the gas fire is fitted it’s no longer possible to reach the electric part. All was fine so it was time to fit the gas fire. The fire sits in the same floor aperture used on the previous fire. The exhaust outlet is in the same place so the original flue pipe easily connects as before, It’s essential to use a new rubber sealing ring whenever the flue is disconnected because on tightening, the rubber seal becomes deformed.

The new fire fitted and connected.
Once the gas was reconnected, the bottle turned on, the air displaced in the pipe, and we had ignition. Whenever gas pipes have been opened, it is essential that on completion of the work, the system is pressure tested. Therefore with a manometer connected, the fire was lit, then turned off. The gas bottle valve was closed and the gas pressure read…. 37 for propane or had I been using butane, it would have been 28. I went and had a coffee and on my return was gratified to see the pressure was holding on 37.

The pressure gauge connected to the gas system.
The new front panel is a big improvement from the old one. Two locking spring levers hold it in place. The gas control knob works in the same way as the original. Turn to 5 on the scale and press down the knob which works the ignition. But now the problem which I mentioned earlier. Had I fitted a new TEB3 blower, it would have come with a switch which would have fitted into the top control panel. However, I was using the original TEB2 fan control. Somehow it needed to be fitted into the panel. I took one of the supplied blanking discs and by cutting and drilling, I made it so that it would mount the TEB2 switch. A little bit of cutting on the front panel allowed the fan control plug to come through.

The new control panel.
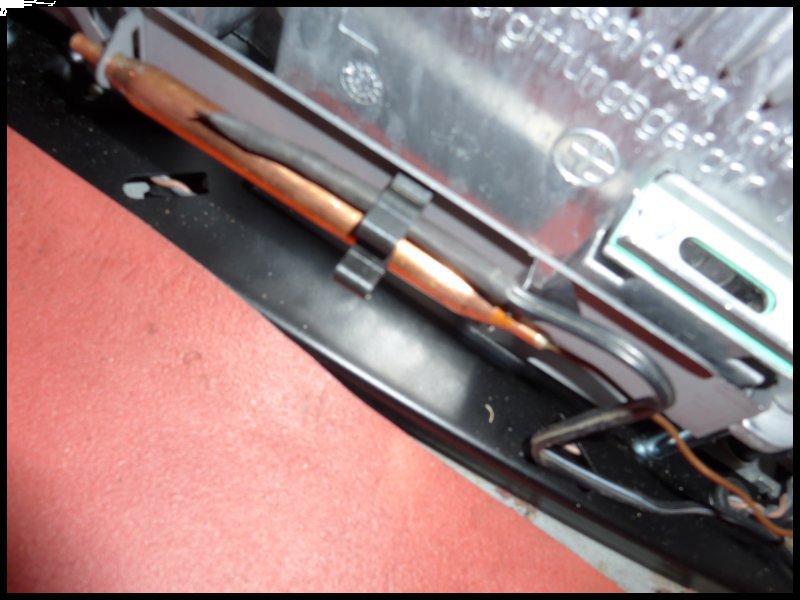
Room thermostat riding piggyback on the fire thermostat.
A final test using the gas fire and a CO detector is all that remains to be done.
