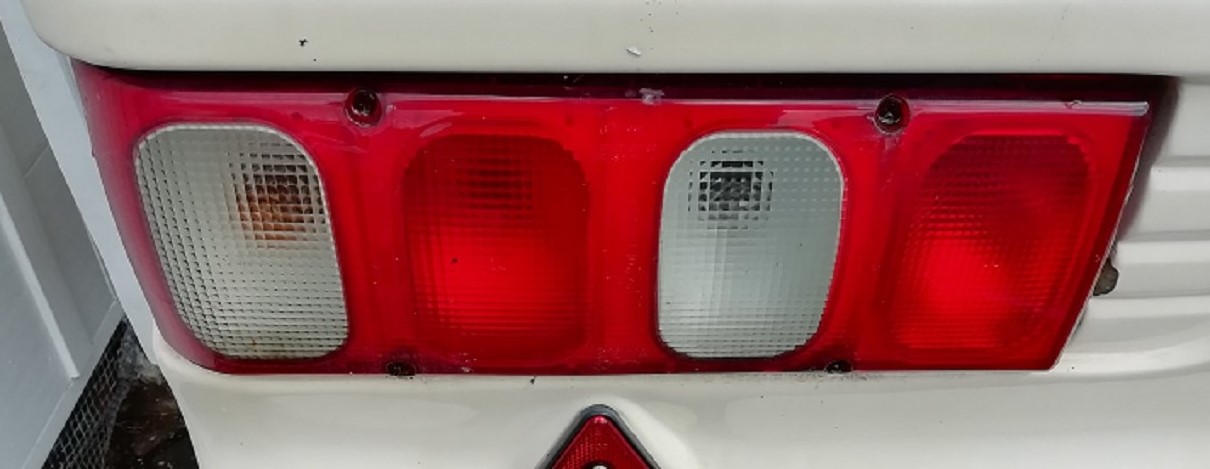
I was getting ready to head for home with all the gear packed away, the legs were up and the van was hitched on. Only the lights to check before leaving – and it’s a tedious job when you’re a solo caravanner. Fortunately, on this occasion, a passing dog walker helped me out. All correct – except that I only had three tail lights. The near-side cluster light wasn’t lit. A judicious tap, and it came on, but almost immediately went off again. I decided to leave it for later since I was driving in daylight.
Not until yesterday did I get around to looking at it. The rear clusters on my van are manufactured by Jokon, which remove simply by removing four screws. Removing the fitting entirely requires the wire on each bulb holder to be disconnected. Before doing so, I suggest taking a photo of the position of each coloured wire so that there is no error in re-fixing.
The bulb bar clips to the plastic cover. Clips move sideway to release.
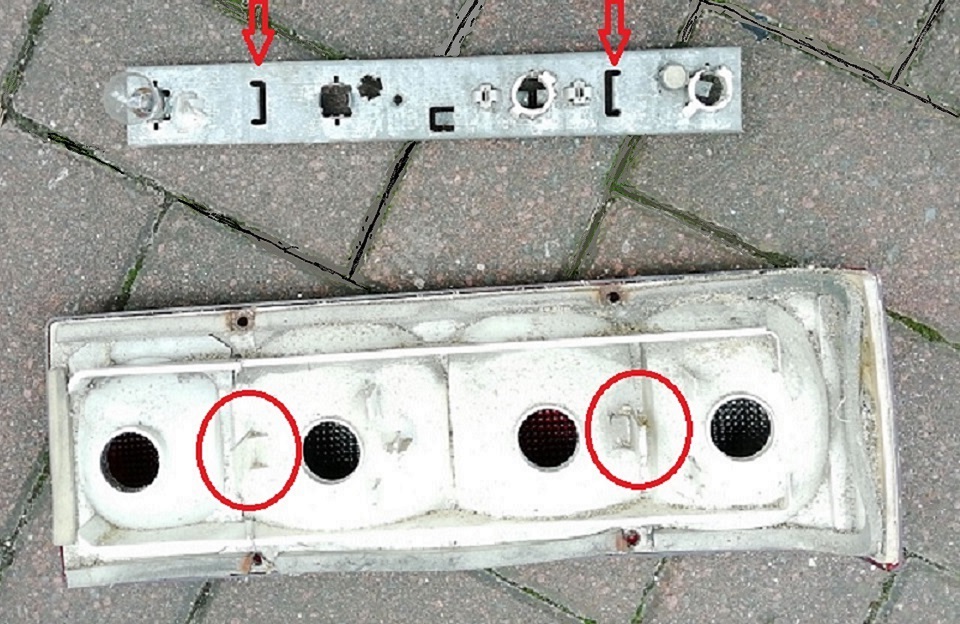
The brake and side light terminals
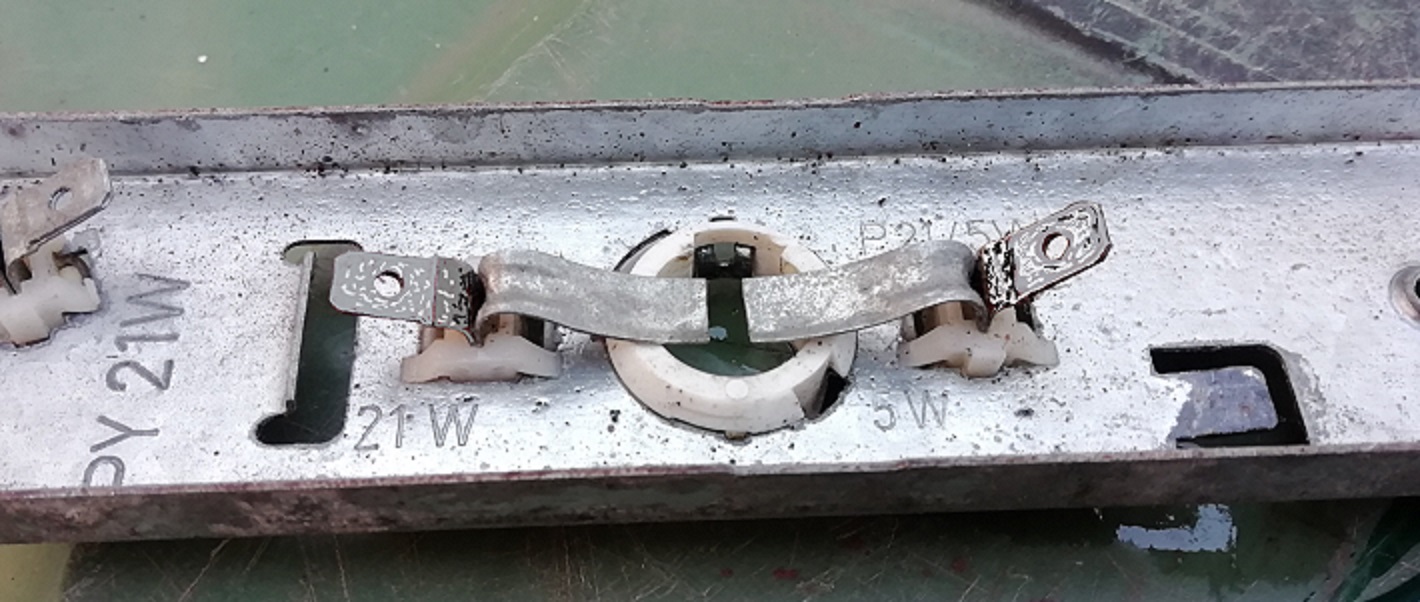
The bulb which supplies the rear light is a double filament bulb – that is one bulb lights for both the rear light and the brakes, so the bulb holder has two positive terminals. Plus the earth
The two base terminals are under slight pressure, each being held in the lighting frame by plastic clips. The terminal for the rear light had lost its tension because one tiny plastic leg was fractured.

The red arrow points to the broken leg allowing the terminal to lose pressure.

The new terminal holders. One assembled. The other is still to be done.
Replacements are available and with the old terminal holder pulled out, a new one was put together and snapped into place.
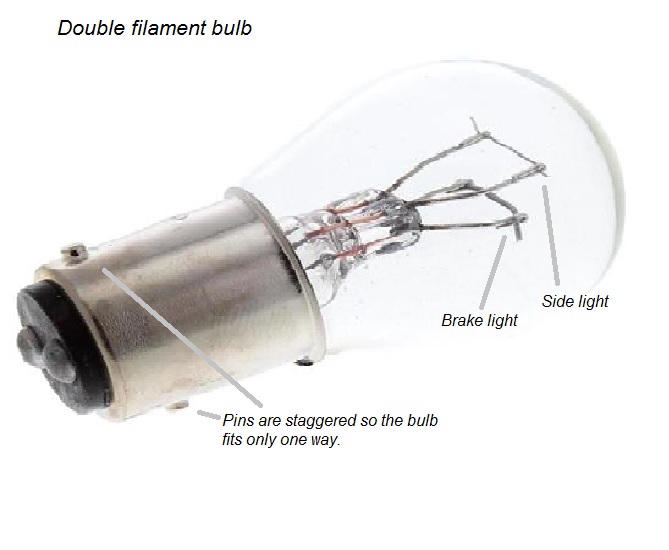
Double filament bulbs because of their staggered pins fit only one way in the holder.
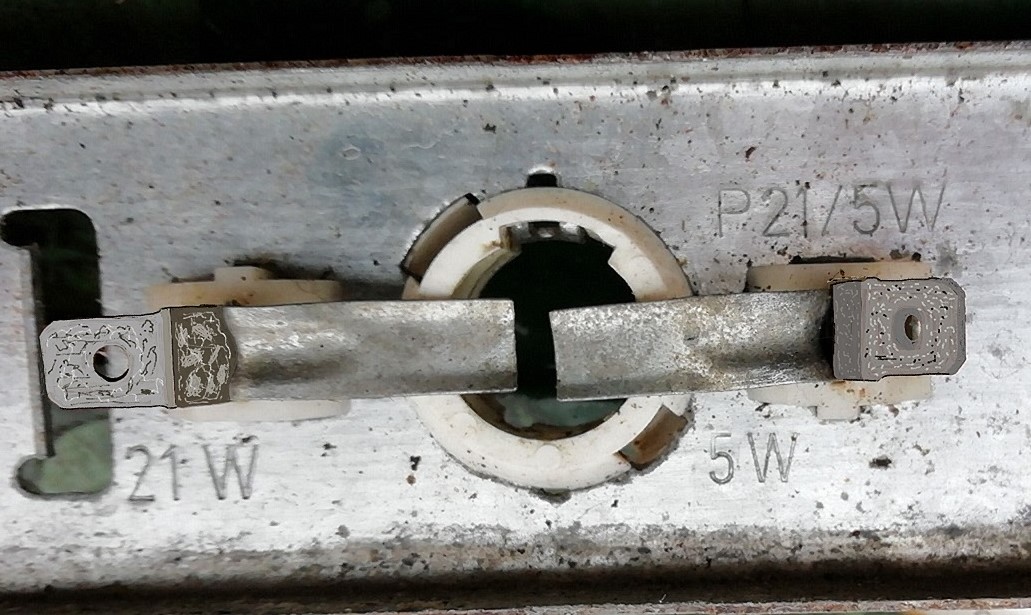
5-watt for the side light and 21-watt for the brake light.

The new terminal is fitted to the bulb holder.
I took the opportunity to remove all the old bulbs, clean up the holders and give them a smear of Silicone grease, before fitting some new bulbs.
