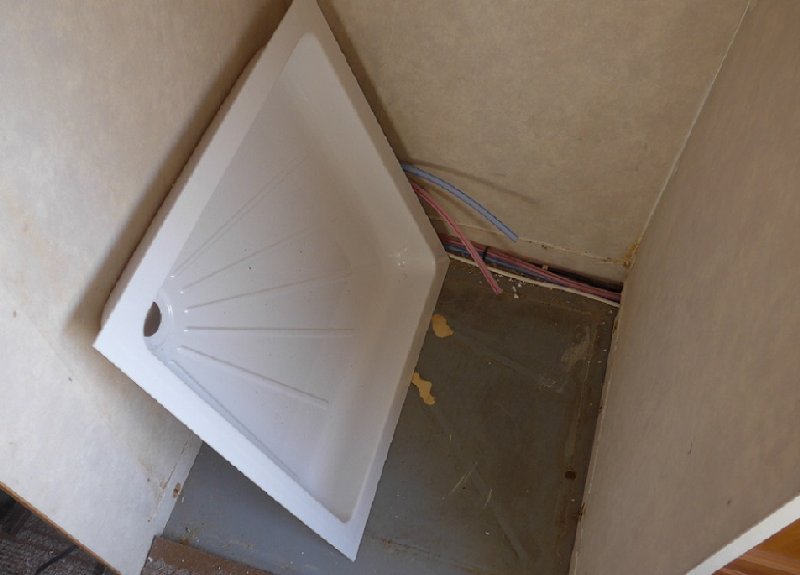
Opinions are polarized over the question of whether or not one should use the caravan’s onboard shower. My choice has always been to use it. Therefore I was horrified when during the past winter spent in Spain I saw what looked like a crack developing across the corner of my shower tray. Upon closer inspection, there was more than just one.


But maybe it’s not surprising. It is, after all, eighteen years old and plastics do seem to become brittle with age. Also, it gets a lot of use – approximately 150 days per year. Without removing the tray there’s no knowing how deep the cracks penetrate. And if the old tray has to come out, it makes sense to replace it with a new one. Should the cracks go all the way through then the floor is going to become damp and eventually lead to rot. After so many years an identical replacement was impossible to find however, a suitable tray was found at https://www.grasshopperleisure.co.uk/ Although it was going to need some modification.
Before I started removing the shower tray, I unscrewed the bifold door. Only when I had it removed and outside, did I realize how coated with limescale it had become. I set to with vinegar and a paintbrush. Eventually, it came up looking like new.
With the six screws removed from the corner unit, the moulding pulled away from the wall, exposing the water pipes behind it. To remove the tap unit completely the water pipes needed disconnecting. Next, I unscrewed the eight screw caps and screws holding in the shower tray. With the screws and the drain outlet removed, I expected the shower tray to lift out, but not a chance. It was firmly glued to the floor with 6mm x12mm strips of adhesive pads along each moulded channel. It would yield to nothing less than a garden spade thrust under the tray. Of course, the tray came out in pieces – shattering along the cracks I noticed several weeks ago. Finally, all was removed and I was relieved to see the wood floor was quite dry and sound.


With the new tray temporarily in place, I could see at once that the drain hole in the floor would need re-cutting. Also, the new tray was smaller than the previous one. There were gaps all around it – 15mm down each side and around 40mm along the back.. Leaving the tray in place, I marked out the position of the new outlet. Then I began cutting the holes for the new drain – 90mm diameter on the top sheet of the floor and 40mm through the bottom sheet.
The old tray had been attached to the floor with 12mmx6mm sticky, spongy strips which also reinforced the fan of ridges across the tray. I used silicone sealant to overfill the grooves on the new tray so that the cured sealant would support the ridges, and at the same time the excess would squeeze over the floor and when cured will hold the tray in place. Some bags of sand on the tray held it down whilst it cured.

The next day some thin but flexible plastic angle was glued between the top surfaces of the shower tray and the walls around the cubicle. Later, when it was completely dry, lengths of upvc window trims were selected from a variety of stock widths. Each piece was measured and mitred then attached with white sanitary silicone to the angle which was laid down yesterday. Because the new shower tray was considerably deeper than the original, the corner unit needed to be raised. That also required the water pipes to be extended by about three inches.

The bifold door also wouldn’t fit in its original position so that also needed to be raised. With a bead of silicone run down the inside of the door frame and around the tap unit, the job was finished.
